-
Project: Brynux OS
I created the Brynux Operating System (Brynux OS) to reduce costs and improve Desktop security.
- Frame 1
Blog
How to install Brynux on a Warehouse Stationary H+O Laptop
Warehouse Stationary has cheap H+O 13" laptops for only $250. They're actually a pretty good laptop but the problem is they only have a 32GB hard disk and after about a year of Windows 10 updates they run out of space. However, the great thing about that is these laptops are perfect for Brynux (or any type of Linux) because Linux uses far less disk space. Here's how I got mine working.
Create a Brynux stick
The important thing to note when creating the stick is it needs to be able to boot from secure EFI. On my Brynux desktop computer I used the following command to write Brynux to a 16GB USB stick:
livecd-iso-to-disk --unencrypted-home --overlay-size-mb 3600 --label BRYNUX-OS --reset-mbr --format --efi brynux-27-x86_64.iso /dev/sdc1
If you're on Windows, OSX or other Linux distro you can use UNetbootin.
You can download the latest version of Brynux from here.
Boot Brynux
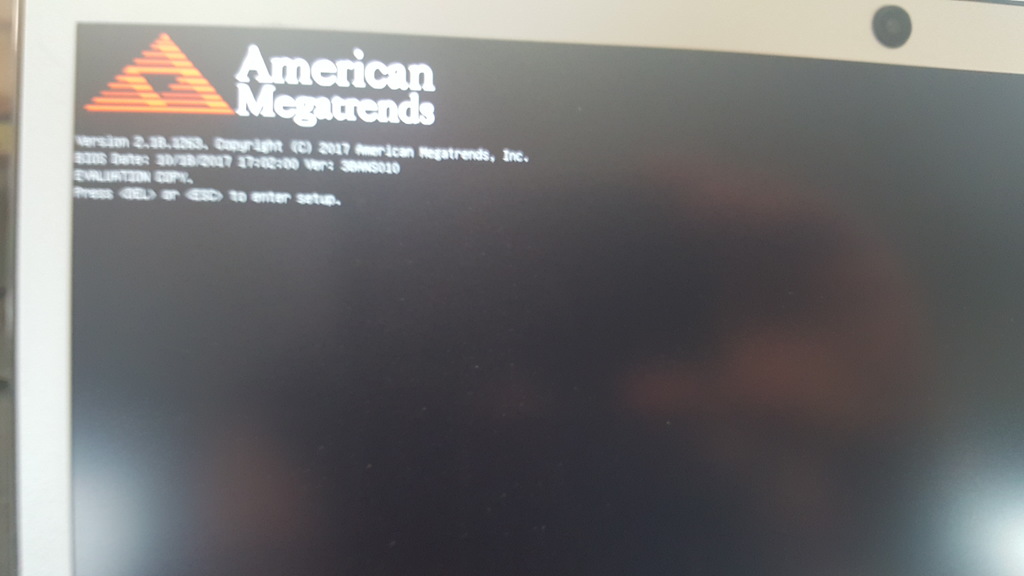
Plug the Brynux stick into your laptop and turn it on. After the American Megatrends bios logo shows there is an option to press the "Delete" key to access the bios settings:
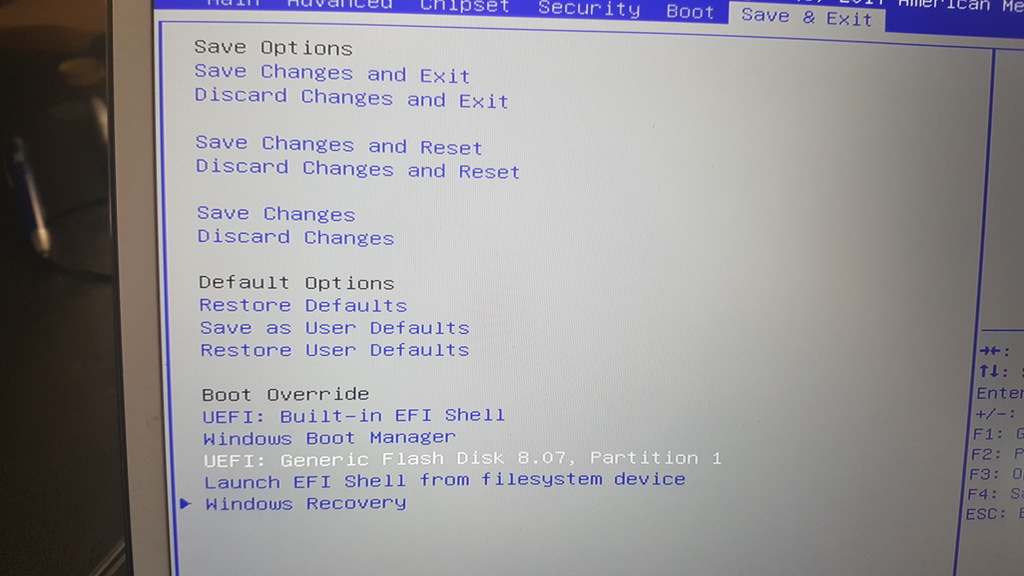
Once in the bios choose "Save and Exit" and choose to boot from "UEFI: Generic Flash Disk" near the bottom of the page then click "Enter" on your keyboard:
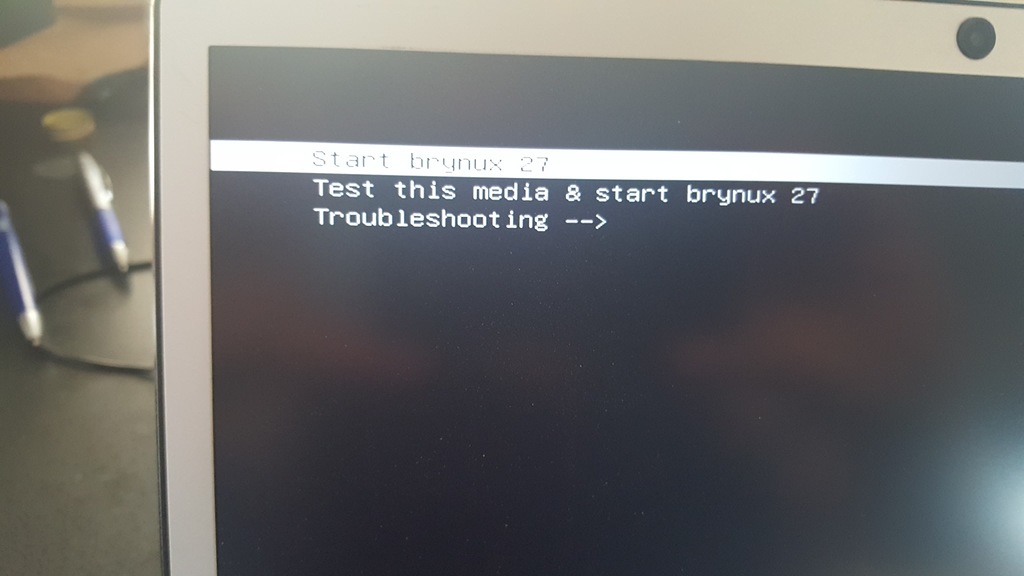
Next the Brynux boot loader will show. Use the arrow keys on your keyboard to select "Start Brynux 27" then click the "Enter" key on your keyboard - It will take ages to boot the first time.
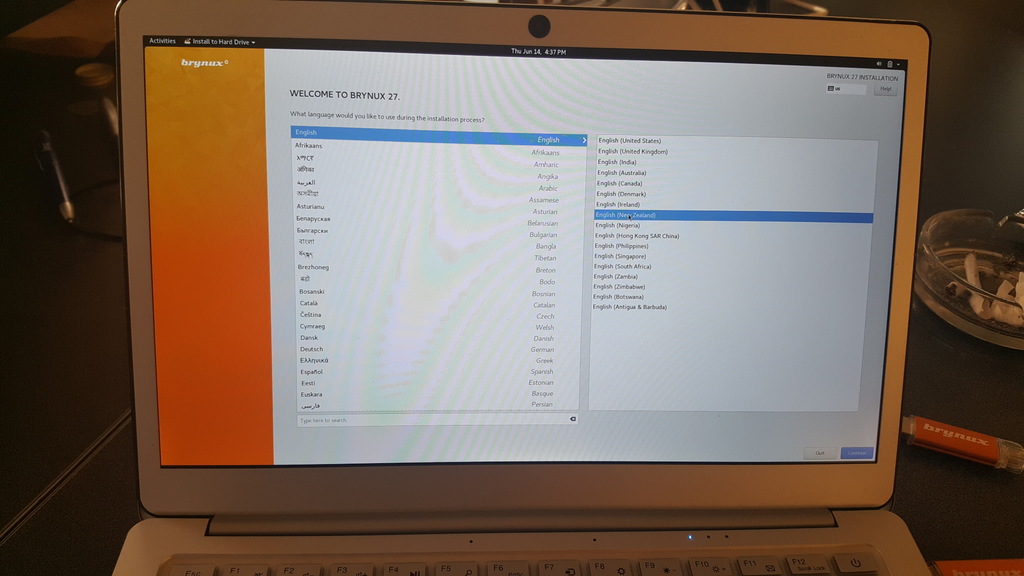
Once it fully boots a window will pop up with the option to "Install to Hard Drive" Do that and follow the install instructions:
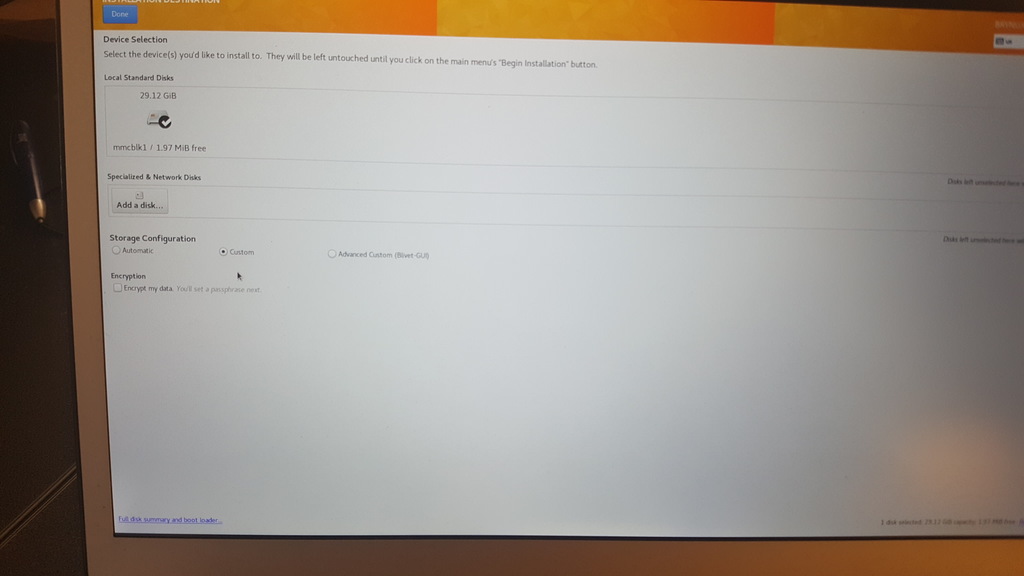
When it gets to the "Installation Summary" page we need to click on "Installation Destination" so we can delete the old Windows 10 partitions from the drive:

On the next page tick "Custom" under "Storage Configuration" then click "Done":
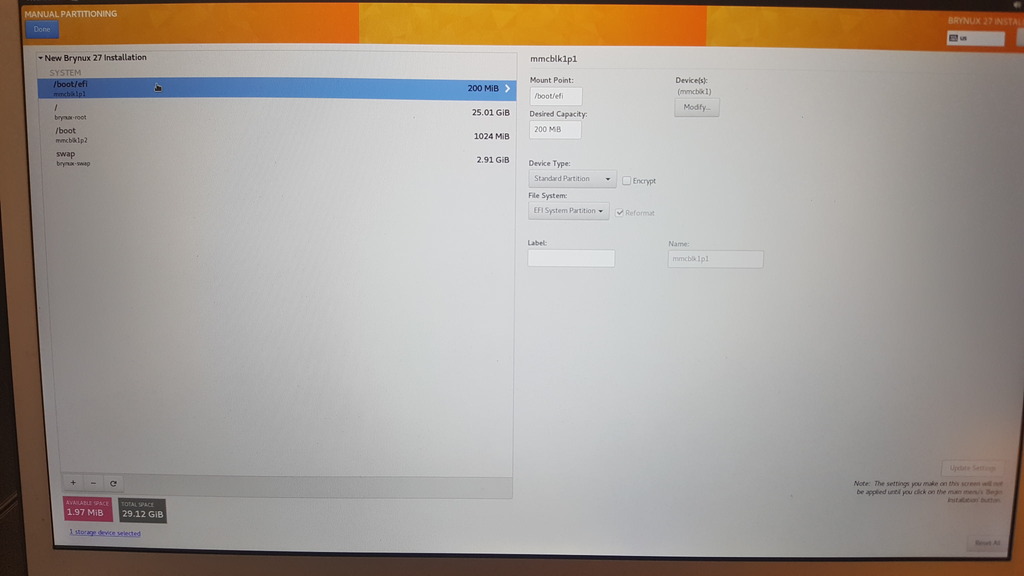
On the "Manual Partitioning" page under "Unknown" section delete all the partitions one by one until they are all gone then above that click "Click here to create them automatically" and follow the onscreen instructions.

It should end up looking like this:
When you get back to the "Installation Summary" screen click the "Begin Installation" button in the bottom right corner:

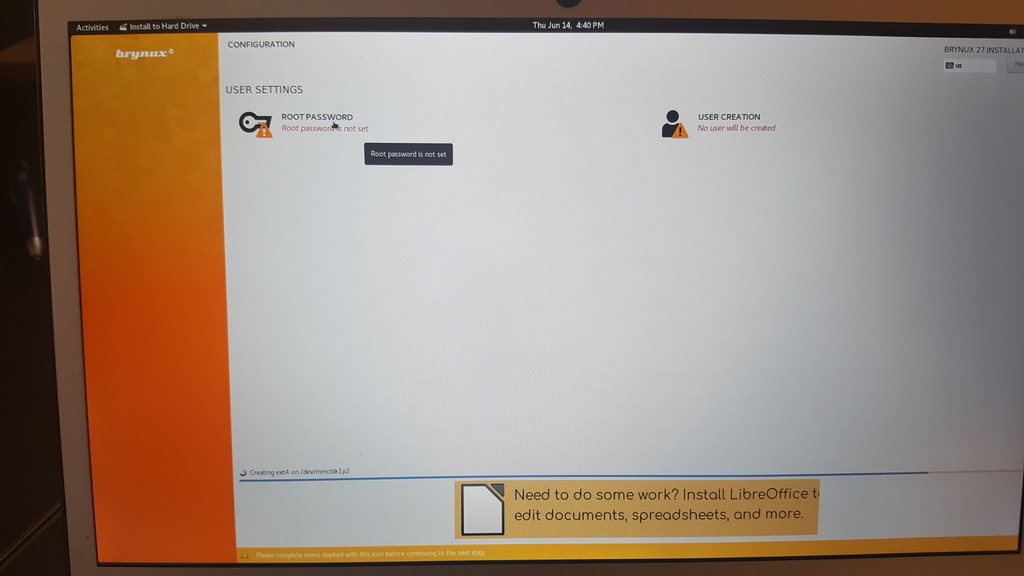
Finally, add a password for the ROOT user and create an account for yourself. The ROOT password is needed to do things like install additional software:
If you have any issues, feel free to contact me.
brynn :-)
- Share:


Latest Posts
Configure Grandstream Handytone 486 to work with 2talk EPEVER Tracer-AN Series 18650 Lithium Configuration How to install Brynux on a Warehouse Stationary H+O Laptop How to install a Fishman Presys Blend Onboard Preamp Google App Engine SSL Will Google shame you? How to reduce your power bill by at least 25% Put image inside laptop monitor Fail2ban honeypot to attract spammers I made this video with my smart phone Amazing photo plugins 31 Days of Brynux 10 Days of brynux


